Caché 2016 Installation
You will need to know the IP address of the server as well as the EPASS updates path. If you do not know these reach out to your IT person or EPASS support and they can be provided to you.
A reminder NOT to purchase a Surface Pro or other Windows Laptop that is using S-Mode. This scaled down version of Windows only allows you to install and run applications from the Microsoft Store. EPASS and or Mobile Technician will not install or run on devices configured for S-Mode.
Before installing anything, you must first turn User Account Control (UAC) off. To do this go to Control Panel > User Accounts and then click the option “Turn User Account Control on or off”. EPASS updates do not operate properly when UAC is turned on, so you may want to leave it off permanently. UAC is very similar to giving a Windows User very low security; it does not allow a program to copy files to the local hard drive.
Things to know before you install:
-
What operating system you are using? (XP, Windows 7, Windows 8, Windows 10)
-
What architecture you're using? (32-bit or 64-bit)
-
What .Net Framework version is installed? (Windows 10 has version 4.0 installed only and you will need to install 3.5 as well.)
-
What permissions does your Windows user have? You need to be logged in as an administrator account for the installation.
-
Do you have access to the updates folder on your server? (\Servername\updates)
Cache Installation
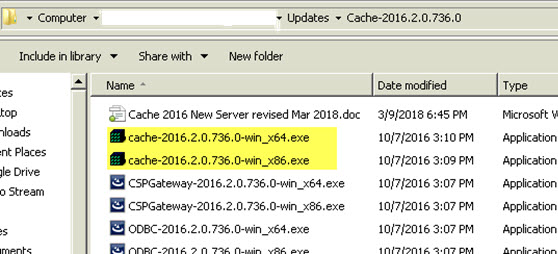
Open the EPASS updates path and select the Cache-2016.2.0.736.0 folder then select “cache-2016.2.0.736.0-win_x64” or “cache-2016.2.0.736.0-win_x86” based on the type of operating system you have.
Accept the terms and conditions and click Next multiple times until you reach this screen:
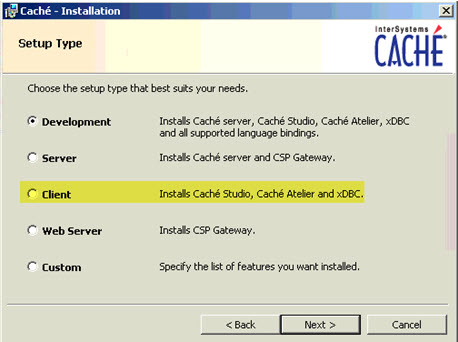
Install Cache select “Client” version when prompted.
Follow prompts on screen, accept all defaults.
Now you can setup the ODBC connections.